

In this guide we will learn how to setup and use the CamDo solar enclosure to capture a time-lapse.
Choosing Your Set-up Location
Keep in mind the sun’s path during the day in regards to composition. Try to avoid facing the sun rise or set to avoid glare from the staring at the sun. This will also prevent the camera from casting a shadow into the frame.
The system is powered by the sun so the position of the solar panel is crucial, especially for longer durations. Position the panel facing the mid day sun. In summer best performance may be 45 degrees or less where winter 45 degrees or more.
If you can place the camera out of reach to help prevent theft or tampering. Avoid touching or manipulating the camera’s position after it’s been set and taking pictures.
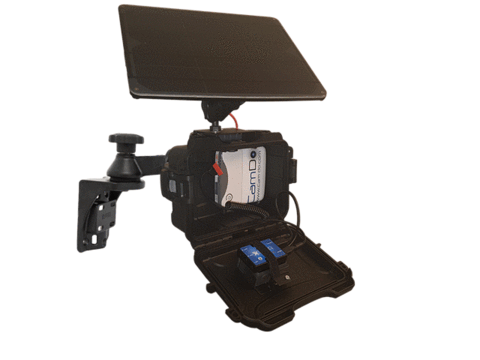
Securing the CamDo System Using the Swivel Mount Kit
The Swivel Mount Kit is used to attach the Enclosure to a wall or pole and easily adjust the camera's field of view. The swing arm pivot allows for full 360-degree rotation and the ball and socket system allows a 360-degree rotation with a 180-degree pivot.

1. Remove the Swivel Arm form the camera and fasten the vertical mounting plate to a fixed surface. There is an indention on the back of the plate to allow solid mounting to a rounded surface such as a pole or rail using hose-clamps or zip ties, as well as multiple screw holes for solid mounting to a flat surface.

2. Loosen the hand-knobs to adjust the angle of the arm. The hand-knobs can optionally be replaced with hex-nuts (9/16") for tamper resistance.
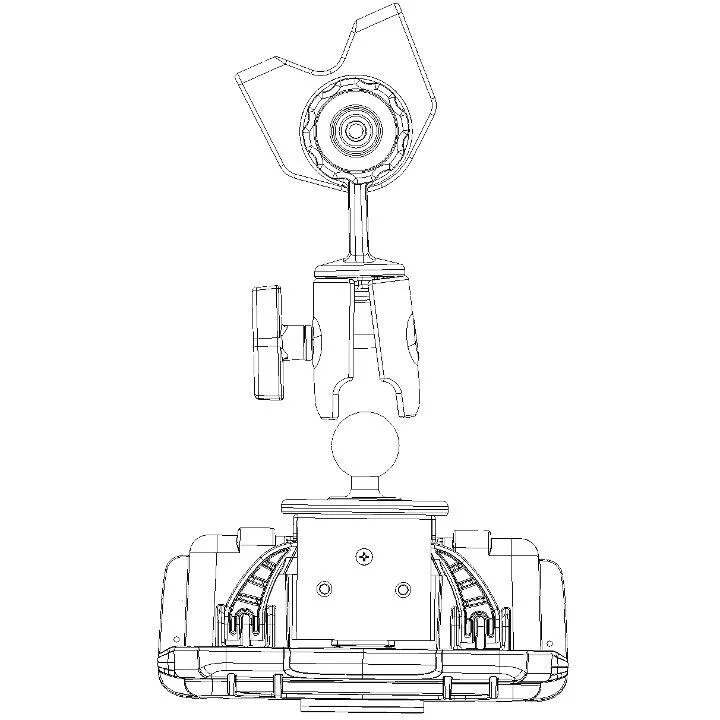
3. Insert the ball on the back of the Enclosure into the socket end of the Swivel Arm. Loosely tighten the socket end to anchor the ball while allowing for movement.
NOTE: Enclosure shown without solar panel to facilitate view.

4. Adjust the angle of the Enclosure to frame the camera's field of view before fully tightening the adjustment knobs.
TIP: The GoPro App, allows for using the GoPro's WiFi signal to provide a live preview of your camera's view on your smartphone/tablet
Framing GoPro Camera view and using the UpBlink Controller
UpBlink is a low power, WiFi enabled GoPro time lapse and scheduler accessory that unlocks the full potential of the GoPro Camera, both of which are inside the enclosure. UpBlink allows users to control when and how the camera will trigger based on a daily schedule and when an internet signal is available, photos can be uploaded to a Cloud server. Configuration is handled through an easy-to-use web interface via a smartphone, tablet or laptop.

1. Before deployment, download the GoPro App, and pair the GoPro camera with your smartphone or tablet.
UpBlink Controller cannot activate the WiFi signal of a GoPro that has not yet been paired with the GoPro App.
Camera pairing instructions can be found on GoPro's website here.
2. Open the front of the enclosure by releasing the latches on both sides. Pushing the grey tab will allow you to pull the latch open.
NOTE: Special care should be taken to ensure that cables or debris do not get trapped in the door when closing. The power-claw latches can exert extreme force, resulting in damage to the cable and the O-ring seal.

3. Press the wifi button on the top of UpBlink Controller. If the LED illuminates green when the button is pressed, holding the button for three seconds will activate the WiFi signal. While booting up the WiFi Access Point signal the LED will flash green once a second. When the WiFi signal becomes active, the LED will flash green quickly five times before continuing to flash green once every five seconds to indicate the WiFi Access Point signal is actively broadcasting.
If the LED illuminates red when the button is pressed, UpBlink is busy triggering the camera and you should wait a for the camera trigger to finish before retrying. See Section on LED Status for additional LED indications.

4. With a smartphone or laptop connect to the UpBlink’s WiFi network that will begin with “UpBlink”. If prompted for a password, the default password is: 1234567890
Now navigate to the URL http://10.0.0.5:5000 with your standard web browser, such as Chrome or Safari. It’s important to include the “http://” as some web browsers require this.


5. Open the manual controls menu to power on the GoPro camera and activate the GoPro's WiFi signal.


6. Open the GoPro App, select the Camera menu to locate and connect to your GoPro camera.

7. Viewing the live preview on the GoPro App, make any fine adjustments to the enclosure angle as necessary to ensure the camera is capturing the correct frame using the Swivel Mount.
Once the perfect shot has been framed, ensure all fasteners are tightened and the enclosure is secure.


8. Reconnect to the BlinkX/UpBlink WiFi signal and use the manual controls menu to turn off the GoPro's WiFi network before turning off the GoPro camera.

9. Press the Sync Time button and ensure the correct time shows. Failure to do this could lead to photos being taken at the wrong time of day such as during the night.

10. Select the required shooting schedule desired by clicking the arrow and edit the start and end dates only. Do not change active times or interval as it has been predetermined for finished video length. Ensure all days are active. Finish by clicking Save All.
Be sure to click the "RESTART IN CAPTURE MODE" button to disable UpBlink's WiFi and the capture schedule will begin! Close the enclosure being sure again to not pinch any cables.
Reference here for more details regarding UpBlink setup.

Need help? No problem!
Simply use the Contact link at the top of the page to send a message. Thanks!